Body Sill and Cowl Support Relationships
- army30th
- Jun 21, 2024
- 3 min read
Today's post is, in my opinion, difficult and simple at the same time. There is a relationship between how the body sills and the floorboard riser/cowl support go together, and before I place the sills on the car, I want to try and "fit" the pieces in their correct placement to minimize failure later. I realize this may not be exactly how this should be done, but it's HOT HOT HOT outside. And the engine is in the car which interferes with this area.
In the area of the floorboard risers, there are four things taking place all at once: riser placement, Sill to frame mounting, firewall mounting/cowl support and PILLAR COUPE placement. The pillar and body sill to frame mount work in tandem. The Floorboard risers, firewall mounting and cowl support also work together.
There's a lot of wood structure here, so let's dig in.

Passenger side

Driver's side
Above, we have photos of each side of the floorboard risers, which is directly connected in two places: body sill and cowl support upright. These assemblies are made from a combination of original pieces and reproduction parts (the reproduction parts I assume, are not for a Centerdoor, but are for a car with wooden floorboard risers, and are made like the originals for the Centerdoor). I know "Fordwood" did not make these, as they are not offered by them.
I have marked an area with a black circle to show the variation in the reproduced parts. The lower area where the floorboard sits is 3 inches for the circled section on the passenger side and is 3.25 inches on the driver side. Each incline will need to be flattened a tiny amount to sit flush on the sill. The bottom of the incline (where the incline meets the sill) is the area that the flat portion of the floorboards rest until it meets the first cross member at the first mortise in the sill. Remember: there are two mortises. The 1/4 inch section will need altering to fit.

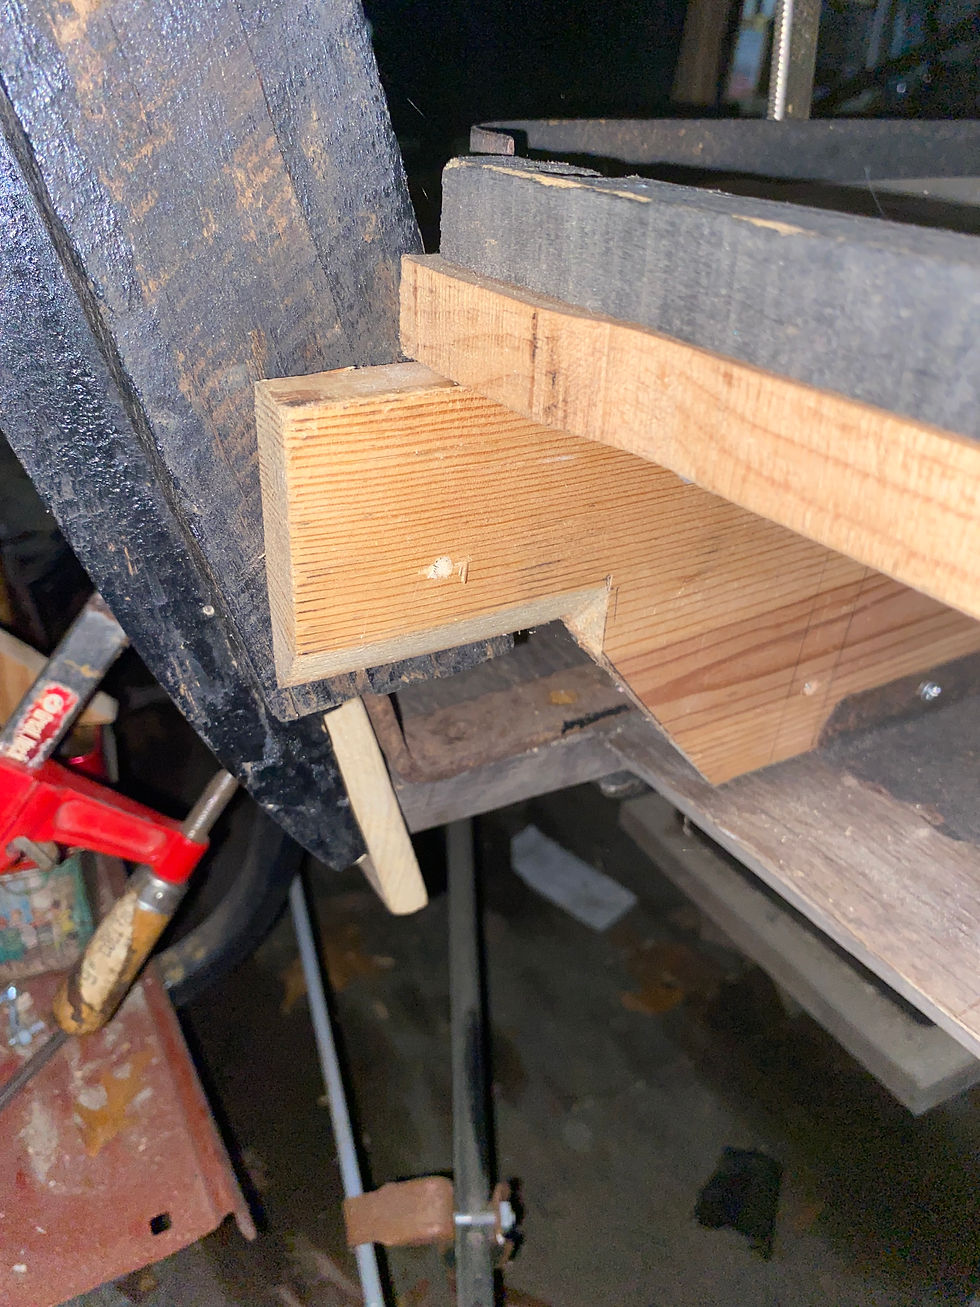
This picture shows an original piece sitting on top of a reproduced piece that makes the incline. I have the reproduced piece that matches this original and am strongly considering swapping it out. The photo shows a drawn circle on the front sill mount to frame. This is where the L-Bracket for the PILLAR COUPE will bolt through and optimally meet a hole in a mounting bracket on the frame. This mounting bracket, along with the correct measurements, will allow the inside edge of the Sill to sit parallel to the frame at 2 3/4 inches, thereby making the sills 29 3/4 inches apart inside to inside.

This photo shows the same as the previous photo. L-Bracket bolts through the marked hole. The notch in each riser is to allow for a socket to manipulate the bolt for tightening. The L-Brackets are not perfect right angles but are themselves angled to meet the pillars and still sit flush on the sill mount.

Our final photo shows the first mortise in the Passenger Side Body Sill. This was made by a previous owner with a Forstner bit and not a square mortise jig. You can see both first mortises in the sills. According to measurements from my remaining original sill piece, they are not technically in the correct location. They are also deeper than the originals. The particular mortise in question (passenger side, first mortise), should be 10 3/4 inches from the Pillar Coupe Notch in the front of the sill. It was not. It sat too far to the rear, so I measured the correct distance and will be drilling out the required material. The mortises, according to my original piece, should be 4.5 inches across. The rear mortise will need the same treatment on this side. This contributed to the sills not fitting properly when placed temporarily on my frame.
All of the above structure, including the curved and straight sections of the cowl support structure not shown, as well as the cowl itself MUST be put together before it is bolted to the firewall, as the cowl is nailed/screwed to the cowl support structure from inside the firewall. The cowl support structure is then bolted to the firewall using four bolts.
Pressing on....More to Come!


Comments