From The Front (to the rear)
- army30th
- Aug 11, 2025
- 2 min read
Updated: Aug 12, 2025
So....it's been a hot minute since my last blog post. The heat here in my location has been unbearable, considering the fact that I work on the Sedan in a Quonset Hut type of portable tent garage (dirt floor and leaves not withstanding). Some of the information presented here has been discussed in previous posts.
Although I am not quite finished with the floor in the car, I decided to start working my way on the body from the front cowl to the rear seat box.
My first order of business was to locate the PILLARS COUPE and RAIL FRONT BELT to the firewall and body sills.

At this point in the photo, only the driver's side pillar has been mocked up. No final attachment is even attempted at this stage. Held in place with a ratchet strap. The driver's door HINGE PILLAR is also mocked up. The recessed section along the front bottom of the sill between the two pillars is for a nailing strip for the interior upholstery. The pillars are screwed to the floor with angle brackets, the front brackets containing a hole for the body mount bolt and are also screwed to the body sill and rocker panels.
Continuing in that same vein, the passenger side is also mocked up.

It is the placement of these pillars that determine the final opening size of the windshield halves. If it is a little too wide, it can be drawn in with a strap and the windshield then screwed into place, starting with the bottom frame.
Continuing down the driver's side of the body, we have placement of a ROCKER, which defines the door opening.

Both rockers will need some amount of tweaking to get them to fit, but the angle is correct. Other than the cowl, the rocker covers are the first sheet metal parts attached to the lower body as the quarter skins wrap around the edges of the rocker sheet panel. And yes...the HINGE PILLAR needs a little love at the bottom. Again, nothing is permanently attached. The opposite side is done the same way.
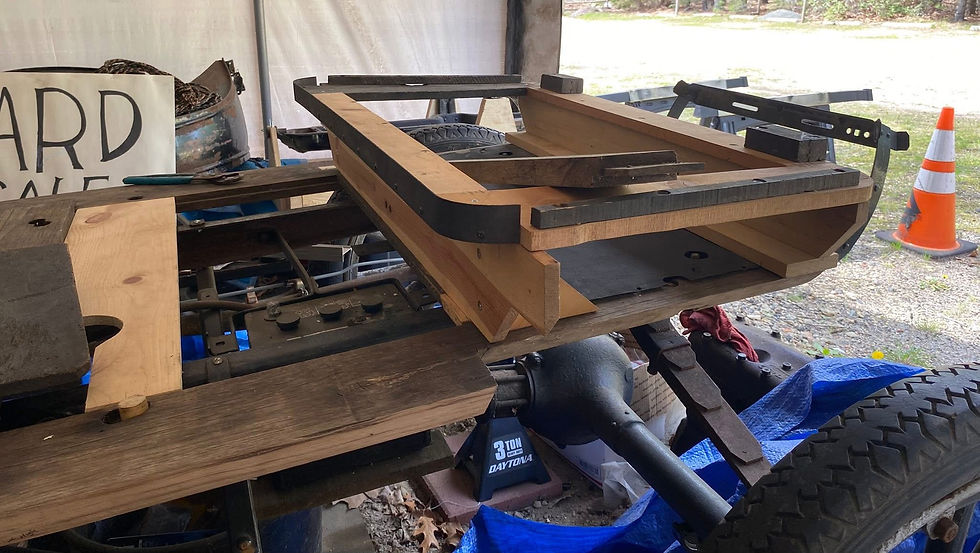
At this point, something becomes evident that I had not anticipated. It would appear that the seat box will not fit in the required space in the proper location. The photos below show where it should be.


Comments