top of page
Search

From the Front to the Rear: Part 2

  • army30th
  • Aug 29
  • 3 min read

This posting will be a continuation of our previous one, detailing how to assemble the rear seat box onto the frame of the Centerdoor Sedan.


The seat box is connected to the LOCK PILLARS by two screws, one on each side, through the seat box heel board to a spacer block that is screwed to the pillars. The seat box is also connected to the middle floor cross member giving us a placement for the rear floorboard pieces and battery access board.


Heel Board hole placement
Spacer Block
Spacer Block

The above photos show the hole in the heel board and the spacer block where the board attaches. Once this is done, the seat box placement is fixed and cannot be lengthened or shortened.


ree

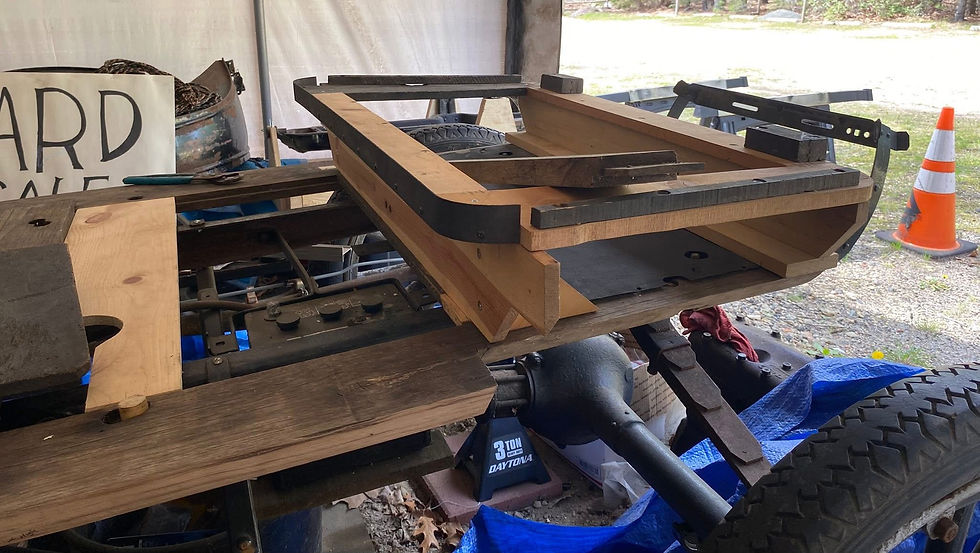
The seat box must sit here or relatively close to it. Ideally, the body mounting bolts should line up with the holes in the seat box bottom, as shown below.


ree

With the seat box disassembled, but mocked in, we now get this spacing.


ree

It's still not ideal, but with a little coaxing, I can get it to draw up further to the front of the car, but then it becomes apparent that the rear cross member is not wide enough and a cut-out has been made to accommodate the rear frame cross member which really wasn't necessary. This will need to be corrected.


There is a fixed measurement that must be adhered to from the front of the LOCK PILLAR to the rear of the side quarter. That measurement is obtained by measuring from the inside face of the pillar to a hole that is pre-cut in the rear quarter panel which allows for a bracket to be bolted to the rear of the seat box. This bracket has a piece of round stock screwed into it that allows for the attachment of the rear fenders and protrudes through the aforementioned hole. I don't show it here, but it is attached to the rear most framing of the seat box, on it's top face. You can see an area just to the side of the short edges of the seat back spacer blocks on the photo of the seat box shown above. That's where the bracket goes. An additional attachment of the window sash goes just above the spacer block on the pillar and to the pillar that is attached to the top of the seat box. The window sash, which sits on top of the pillar spacer block, is to be level in the framework of the body, with the angle of the seat determined by how high the box sits on the BODY SILL, keeping the location of the bracket in mind. The bracket also has the rear most framing pillar bolted to it with two bolts..


The window sash MUST be attached first to the LOCK PILLAR, then the spacer block is attached, and finally the heel board. At that point, the sash is attached to the rear most upright that sits on top of the seat box.


Once the seat box is secured, placement of the belt rail, side window belt rails, rear window framing and window headers can be begin to be installed. The roof rails would be the last item attached to the body framing, including the windshield header and instrument panel.


At this point in assembly, NOTHING is permanently secured. Everything is just mocked up to prepare for final assembly.


Comments


bottom of page